Handling Passwords Before Login in Azure AD B2C (Password Salt)
Introduction
In this post, I will address a controversial method, as sending passwords through requests is not recommended, but sometimes it is the only solution you'll find.
Imagine you are migrating your users to Azure AD B2C. All your passwords are encrypted with SHA-256, and the project management does not want users to reset their passwords. The type of encryption does not matter as long as the hash never changes. If the encryption used in your project is reversible, there is no need to follow this post. You can simply decrypt the passwords and import them directly (which would even be ideal).
Considering your encryption is irreversible and immutable (unless the user sets a new password), when you started populating your Azure AD B2C, you had no control over what the user's actual password was. It was something like this:

So when you created your user, it was something like:
1var graphNewUser =2new User3{4Identities =5new List<ObjectIdentity>()6{7new ObjectIdentity()8{9SignInType = "emailAddress",10Issuer = AzureAdB2CTenant,11IssuerAssignedId = "julianobiffi@hotmail.com"12}13},14PasswordProfile =15new PasswordProfile16{17ForceChangePasswordNextSignIn = false,18Password = "157edfef911735f5446d87c1889e47a6b6e34b3be4caf511b1dbf2d74fae7117"19},20PasswordPolicies = "DisablePasswordExpiration,DisableStrongPassword",21//Other properties22};2324await _GraphApiService.GraphServiceClient25.Users26.PostAsync(graphNewUser);
Starting from this, when the user tries to log in with their password techbiffi123, it will not work because, for Azure AD B2C, their password is 157edfef911735f5446d87c1889e47a6b6e34b3be4caf511b1dbf2d74fae7117. This is where the solution comes in: we will intercept the user's password, apply the hash from your legacy project, and attempt to log in using this hashed password through custom policies and leveraging SocialAndLocalAccounts.
Implementation
ClaimType Creation
To manage and use the hashed password throughout the flow, it will be necessary to define a ClaimType within the ClaimsSchema.
TrustFrameworkBase.xml1<ClaimsSchema>2<!-- Others Claim types -->34<ClaimType Id="passwordWithEncrypt">5<DisplayName>passwordWithEncrypt</DisplayName>6<DataType>string</DataType>7<UserHelpText>Defines the user password with my legacy hash applied.</UserHelpText>8</ClaimType>9</ClaimsSchema>
Creation of Technical Profiles
The first technical profile that needs to be defined is the RESTful technical profile to send the password the user entered, send it to your API, and receive the password with the applied hash.
TrustFrameworkBase.xml1<ClaimsProvider>2<Domain>Password Encription</Domain>3<DisplayName>Request To encrypt the password</DisplayName>4<TechnicalProfiles>5<TechnicalProfile Id="REST-PasswordEncription">6<DisplayName>Apply the legacy encryption into the provided password</DisplayName>7<Protocol Name="Proprietary"8Handler="Web.TPEngine.Providers.RestfulProvider, Web.TPEngine, Version=1.0.0.0, Culture=neutral, PublicKeyToken=null" />9<Metadata>10<Item Key="ServiceUrl">11{Settings:MyApiUrl}/EncryptPassword</Item>12<Item Key="SendClaimsIn">Body</Item>13<Item Key="AuthenticationType">ApiKeyHeader</Item>14</Metadata>15<CryptographicKeys>16<Key Id="x-functions-key" StorageReferenceId="B2C_1A_RestApiKey" />17</CryptographicKeys>18<InputClaims>19<InputClaim ClaimTypeReferenceId="password" />20</InputClaims>21<OutputClaims>22<OutputClaim ClaimTypeReferenceId="passwordWithEncrypt" PartnerClaimType="passwordWithEncrypt" />23</OutputClaims>24</TechnicalProfile>25</TechnicalProfiles>26</ClaimsProvider>
Now you will need to duplicate the technical profile login-NonInteractive, which is responsible for user login. After duplicating, change the InputClaim of password to point to the ClaimTypeReferenceId passwordWithEncrypt.
TrustFrameworkBase.xml1<ClaimsProvider>2<DisplayName>Local Account Sign In With Password Encryption</DisplayName>3<TechnicalProfiles>4<TechnicalProfile Id="login-NonInteractive-password-encryption">5<DisplayName>Local Account Sign In With Password Encryption</DisplayName>6<Protocol Name="OpenIdConnect" />7<Metadata>8<Item Key="ProviderName">https://sts.windows.net/</Item>9<Item Key="METADATA">https://login.microsoftonline.com/{tenant}/.well-known/openid-configuration</Item>10<Item Key="authorization_endpoint">https://login.microsoftonline.com/{tenant}/oauth2/token</Item>11<Item Key="response_types">id_token</Item>12<Item Key="response_mode">query</Item>13<Item Key="scope">email openid</Item>14<!-- <Item Key="grant_type">password</Item> -->1516<!-- Policy Engine Clients -->17<Item Key="UsePolicyInRedirectUri">false</Item>18<Item Key="HttpBinding">POST</Item>19</Metadata>20<InputClaims>21<InputClaim ClaimTypeReferenceId="signInName" PartnerClaimType="username" Required="true" />22<InputClaim ClaimTypeReferenceId="passwordWithEncrypt" PartnerClaimType="password" Required="true" />23<InputClaim ClaimTypeReferenceId="grant_type" DefaultValue="password" AlwaysUseDefaultValue="true" />24<InputClaim ClaimTypeReferenceId="scope" DefaultValue="openid" AlwaysUseDefaultValue="true" />25<InputClaim ClaimTypeReferenceId="nca" PartnerClaimType="nca" DefaultValue="1" />26</InputClaims>27<OutputClaims>28<OutputClaim ClaimTypeReferenceId="objectId" PartnerClaimType="oid" />29<OutputClaim ClaimTypeReferenceId="tenantId" PartnerClaimType="tid" />30<OutputClaim ClaimTypeReferenceId="givenName" PartnerClaimType="given_name" />31<OutputClaim ClaimTypeReferenceId="surName" PartnerClaimType="family_name" />32<OutputClaim ClaimTypeReferenceId="displayName" PartnerClaimType="name" />33<OutputClaim ClaimTypeReferenceId="userPrincipalName" PartnerClaimType="upn" />34<OutputClaim ClaimTypeReferenceId="authenticationSource" DefaultValue="localAccountAuthentication" />35</OutputClaims>36</TechnicalProfile>37</TechnicalProfiles>38</ClaimsProvider>
Next, we need to include both profiles in the technical profile in the login flow, which is done through SelfAsserted-LocalAccountSignin-Email. We will add them inside the ValidationTechnicalProfiles. Note that I added the encrypted password flow before the conventional login. In a scenario where the user has already reset the password in the Azure portal, they wouldn’t need to go through the encryption flow; however, they will still go through it, increasing the time in the login journey. What we can do is create a custom attribute to define whether the user has already reset their password via Azure AD B2C and avoid them going through this flow if they enter the wrong password. However, that will be for another post.
TrustFrameworkBase.xml1<ValidationTechnicalProfiles>2<!-- Login flow with legacy encryption -->3<ValidationTechnicalProfile ReferenceId="REST-PasswordEncription" ContinueOnError="true" />4<ValidationTechnicalProfile ReferenceId="login-NonInteractive-password-encryption" ContinueOnError="true" ContinueOnSuccess="false">5<Preconditions>6<Precondition Type="ClaimsExist" ExecuteActionsIf="false">7<Value>passwordWithEncrypt</Value>8<Action>SkipThisValidationTechnicalProfile</Action>9</Precondition>10</Preconditions>11</ValidationTechnicalProfile>1213<ValidationTechnicalProfile ReferenceId="login-NonInteractive" ContinueOnError="true" ContinueOnSuccess="false"/>14</ValidationTechnicalProfiles>
The use of ContinueOnError="true" and ContinueOnSuccess="false" is necessary because, without ContinueOnError="true", the validation profile would already return an error (in scenarios where the user has already reset their password or if the API returns an error) and would not continue. But don’t worry, if all three profiles return an error, the user will receive a message stating that the entered password is incorrect.
Since we duplicated the login-NonInteractive technical profile and transformed it into login-NonInteractive-password-encryption, we will also need to include the client-id, IdTokenAudience, and resource-id information in the TrustFrameworkExtensions.xml.
TrustFrameworkExtensions.xml1<ClaimsProvider>2<DisplayName>Local Account Sign In With Password Encryption</DisplayName>3<TechnicalProfiles>4<TechnicalProfile Id="login-NonInteractive-password-encryption">5<Metadata>6<Item Key="client_id">{Settings:ProxyIdentityExperienceFrameworkClientId}</Item>7<Item Key="IdTokenAudience">{Settings:IdentityExperienceFrameworkClientId}</Item>8</Metadata>9<InputClaims>10<InputClaim ClaimTypeReferenceId="client_id" DefaultValue="{Settings:ProxyIdentityExperienceFrameworkClientId}" />11<InputClaim ClaimTypeReferenceId="resource_id" PartnerClaimType="resource" DefaultValue="{Settings:IdentityExperienceFrameworkClientId}" />12</InputClaims>13</TechnicalProfile>14</TechnicalProfiles>15</ClaimsProvider>
Everything is ready now; just compile your policies and upload them. It’s important to emphasize that Azure AD B2C typically has a propagation delay of up to 30 minutes for new policies. So don’t be alarmed if nothing happens immediately after uploading. One practice that helps me a lot during testing is to delete the TrustFrameworkBase.xml and wait for propagation in my SignUpOrSignin. Once it starts to throw errors, I upload the new TrustFrameworkBase.xml and proceed with the tests.
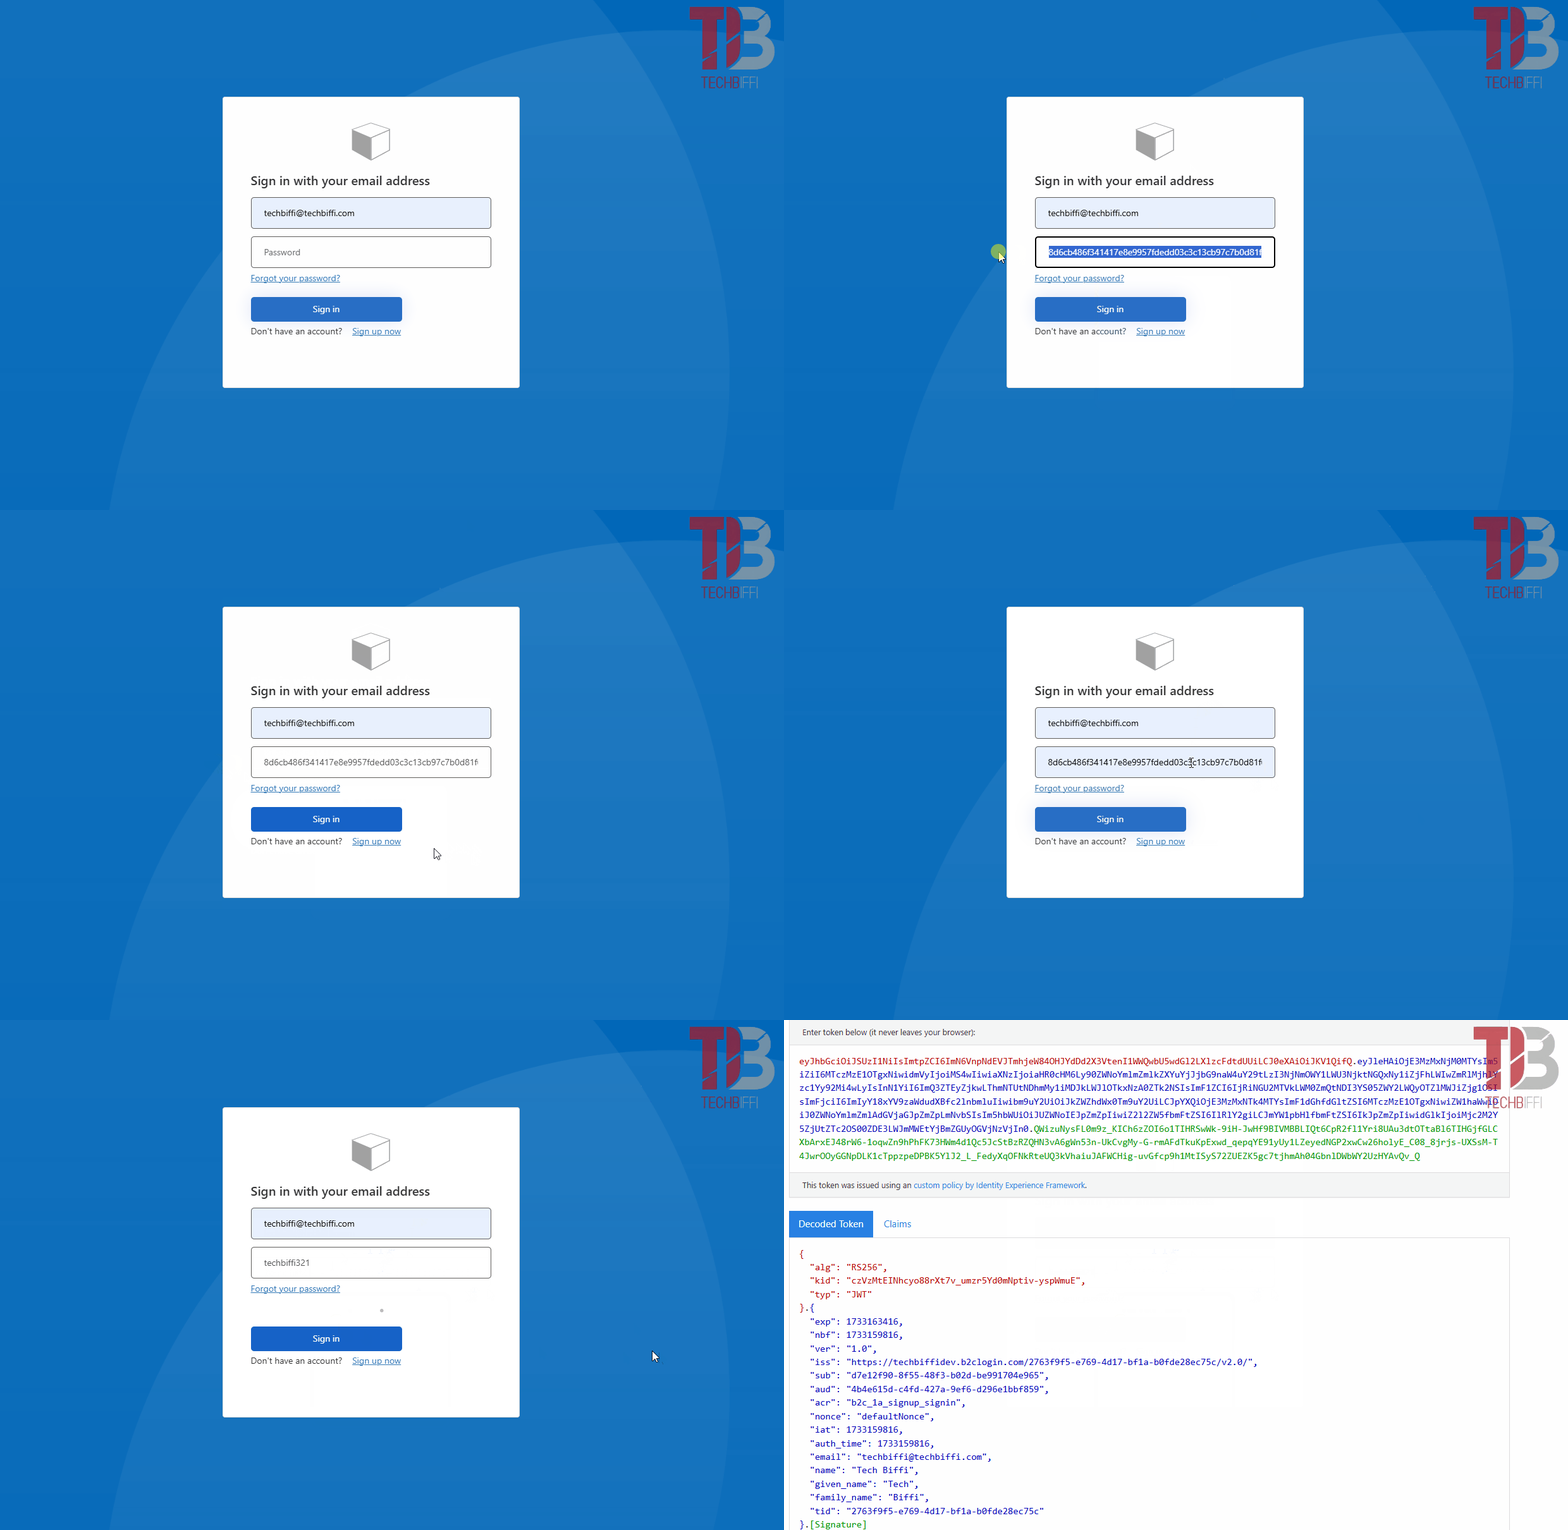
Below, I demonstrate the login flow. Initially, with the "original" password populated in my Azure AD B2C user (the login is performed using the conventional flow). Then, I log in again, this time with the "real" user password (the login is done using the password encryption flow, where I send the password, receive the new password, and log in with it).

If you got lost at any point, I recommend going back and following the steps carefully. If it’s easier, I’ll leave my B2C repository for the project, where the changes were made in commit fc43d32.